





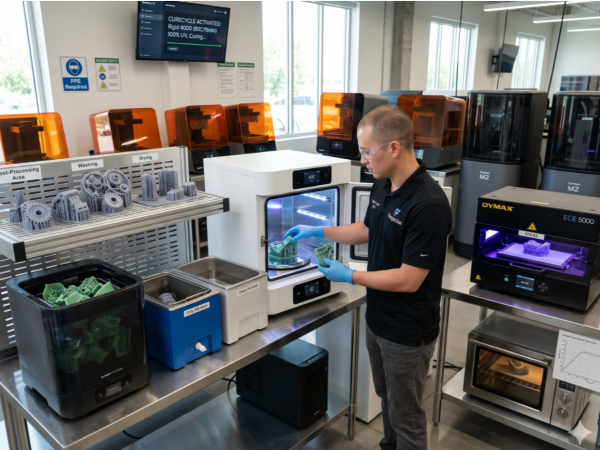
By Felix Lee, CEO at Forgecise
Published: May 25, 2026
Author Bio: Felix Lee is the CEO at Forgecise, specializing in additive manufacturing workflows, B2B process optimization, and industrial post-processing standards for engineering-grade photopolymers.
If you walk onto any professional additive manufacturing floor today, you will notice that vat photopolymerization technologies—like Stereolithography (SLA), Digital Light Processing (DLP), and Liquid Crystal Display (LCD) printing—have moved far beyond simple prototyping. We use them for final-part production.
But I constantly hear one specific question from operators trying to hit tight engineering tolerances: how long to cure resin prints to get maximum performance?
When a part comes right off the printer in its “green state,” it remains only partially polymerized. It holds unreacted monomers, oligomers, and photoinitiators trapped inside a semi-solid polymer matrix. Post-curing acts as the mandatory final step. You need it to maximize cross-linking density, which locks in the material’s ultimate mechanical, thermal, and chemical resistance properties.
This guide breaks down the chemical mechanisms, lists official manufacturer parameters for major industrial resin systems, and offers clear solutions for the engineering challenges I see operators run into every day.
1. The Chemistry Behind Post-Curing: What Actually Happens
To figure out how long to cure resin prints, we have to look at the chemistry. A photopolymerized part gets its mechanical properties directly from its cross-linking density. When UV light hits the liquid resin during the print job, it solidifies the material. However, steric hindrance and vitrification limit how much of it actually converts.
Polymerization Kinetics and Convective Heat
Using UV light alone often fails to get the job done for high-performance engineering resins. As the polymer network tightens, the remaining unreacted functional groups stop moving easily, which halts the polymerization process.
We express the double-bond conversion fraction like this:
Here, represents the initial concentration of monomer double bonds, and represents the remaining concentration after curing time .
When you introduce convective heat, you push thermal energy into the polymer network. This pushes the temperature up near or above the glass transition temperature (). This thermal shift increases chain segment mobility—something mapped via Dynamic Mechanical Analysis (DMA) as the alpha transition ().
The storage modulus relation:
controls the stiffness of the polymer network as cross-linking happens. This molecular movement lets the remaining reactive groups find each other, finishing the cross-link.
We represent this temperature-dependent reaction rate using the Arrhenius conversion kinetics equation:
Where is the pre-exponential factor, is the activation energy, is the universal gas constant, is the absolute temperature, and is the reaction order. This proves why elevating the temperature directly speeds up the polymerization rate.
Dual-Cure Systems and Thermal Cross-Linking
High-end industrial resins, like the ones Carbon makes, use a dual-cure chemistry. The primary cure relies on UV-activated photopolymerization to lock in the geometry (the green state). The secondary cure happens in a convection oven. This baking process triggers an independent thermal chemistry (like polyurethane or epoxy reactions) to hit engineering-grade strength. For a material like EPX 82, you must run a 12.5-hour thermal cure ramping from up to .
Fixing Dimensional Accuracy and Differential Shrinkage
When you bake green-state parts, they shrink. The heat evaporates residual diluents and forces further polymerization. Thinner walls lose mass and shrink faster than thicker walls, which causes differential shrinkage and warping.
Running a preliminary UV post-cure with high-intensity flood systems—like a Dymax ECE 5000 or a PCU90—before you bake the parts does three specific things:
- Monomer Conversion: It quickly converts unreacted monomers in the green state, locking them in chemically to reduce mass loss during the bake.
- Green Strength Elevation: It raises the green storage modulus and . This lets parts with unsupported overhangs resist gravitational sagging even in ovens hitting .
- Warping Mitigation: It drops differential shrinkage by to , depending on the resin, and cuts internal print stress warpage by up to .
Table 1: Shrinkage and Accuracy Optimization via Preliminary UV Post-Cure
| Resin System | Curing Unit Configuration | Dimensional Geometry Metric | Untreated Shrinkage | Treated Shrinkage | Relative Shrinkage Reduction |
| EPX 82 | PCU90 Curing Chamber | wall | Reduction | ||
| EPX 82 | PCU90 Curing Chamber | wall | Reduction | ||
| EPX 82 | Dymax Flood Unit | wall | Reduction | ||
| EPX 82 | Dymax Flood Unit | wall | Reduction | ||
| RPU 130 | Dymax Flood Unit | wall | Reduction | ||
| RPU 130 | Dymax Flood Unit | wall | Reduction |
2. Manufacturer Guidelines: Material-Specific Curing Parameters
You cannot guess these numbers. Getting physical properties and dimensional tolerances right means matching the process exactly to the resin chemistry, part geometry, and curing equipment.
Table 2: Curing Parameters for Professional and Industrial Resins
| Material Family | Resin Version | UV Curing Duration | Chamber Temp | UV Wavelength | Key Mechanical Target / Special Notes |
| Formlabs Standard | Grey, Black, White, Color | 30 – 60 minutes | 60 minutes maximizes tensile modulus. | ||
| Formlabs V5 | Black V5, Clear V5 | 5 – 15 minutes | Room Temp / | 5 min at RT preserves peak dimensional accuracy. | |
| Formlabs Rigid | Rigid 4000 | 15 minutes | Increases elastic modulus by ; avoid over-curing. | ||
| Formlabs Engineering | Draft, Draft V2 | 5 minutes | Room Temp / | Use room temp for elongation; for tensile strength. | |
| Formlabs Specialty | Alumina 4N Resin | Equipment Dependent | None (Air Dry) | Cracks when exposed to water/IPA; use Ceramic Wash Solution. | |
| Formlabs Elastomeric | Silicone 40A Resin | Equipment Dependent | Room Temp | Must wash in IPA + n-Butyl Acetate. | |
| Formlabs Wax | Castable Wax, Wax 40 | 0 – 30 minutes | Room Temp | No UV (Wax V1) | Do not heat; thermal exposure causes wax melting. |
| BASF Ultracur3D | Rigid RG 3280 White | Equipment Dependent | Room Temp | Post-bake at for 3h improves HDT and whiteness. | |
| BASF Ultracur3D | Tough ST 80 | Equipment Dependent | Room Temp | Meticulous 30-min drying at is required post-wash. | |
| BASF Ultracur3D | Flexible EL 60 | Room Temp | Printed layers need specific power densities (). | ||
| Loctite Industrial | IND405 BK | Setup Dependent | Room Temp | High elongation; condition at , RH. | |
| Loctite Medical | MED3394 (Sterilizable) | Setup Dependent | Room Temp | @ | Biocompatible (ISO 10993/USP Class VI). |
| Loctite Elastomeric | IND475 WH | Equipment Dependent | Submerged in Water | Wide Spectrum | Submerge in transparent water vessel; apply mold release. |
| Loctite Concept | PRO9317 CL | Equipment Dependent | Room Temp | LED / Wide Spectrum | Translucent parts; low water absorption prevents haze. |
| Loctite Tough | PRO476 BK | Equipment Dependent | Room Temp | LED / Wide Spectrum | High toughness, moderate HDT (). |
Specialized Material Needs
Following standard procedures for specialty materials will ruin your prints. Elastomers like Formlabs Silicone 40A require custom chemical washes. Technical ceramic formulas like Alumina 4N will suffer micro-cracking if you expose them to trace amounts of water or alcohols during clean-up.
If you print biocompatible resins for dental or medical use, you must follow the manufacturer-validated workflow exactly (printing, washing, drying, and post-curing). Any deviation means the parts will fail FDA and ISO safety standards.
3. Post-Curing Hardware: Professional Chambers vs. Ambient Curing
When you run a B2B operation, you cannot rely on unpredictable UV sources like direct sunlight. The weather fluctuates, wavelengths vary, and operators have to manually rotate parts. Standard curing requires uniform light coverage, tight heat control, and an exact wavelength match. Sunlight takes anywhere from 2 to 10 hours depending on the part’s thickness.
Cheap DIY curing boxes usually feature basic UV LED ribbons that lack temperature regulation. I see this lead to incomplete core conversions and warped geometries constantly.
Professional curing stations combine high-capacity heaters with multi-directional LED arrays. This equipment guarantees consistent mechanical performance, dropping processing times for miniatures down to 1–2 minutes, and complex prototypes to 5–15 minutes.
Table 3: Technical Comparison of Professional Curing Units
| Technical Specification | Formlabs Form Cure (2nd Gen) | Formlabs Form Cure L | Wicked Engineering CUREbox |
| Wavelength Output | (48-LED Array) | (45-LED Modules) | Mixed and (Simultaneous) |
| UV Irradiance Power | High-Power Multi-Directional Array | output | |
| Chamber Chamber Size | () | ||
| Maximum Temp Range | range | ||
| Turntable Rotation | Standard Rotating Platform | Rotating reflective stage | Static (uses diffused reflective panels) |
| Heating Elements | Convective (reaches in 60s) | Dual convective elements | Standard internal convective heat |
| Unit List Price |
4. Operational Safety and Washing Workflows
The Two-Bath Washing Setup
Washing parts in saturated solvents leaves residual uncured resin on your prints, which ruins the surface finish. As you reuse the solvent, dissolved resin builds up. Pulling a part out of this bath leaves a highly diluted film on it. When that film hits the UV chamber, it cures into a shiny, sticky, uneven layer.
You avoid this by using a two-bath system:
- Primary “Dirty” Bath: Removes of the bulk uncured resin.
- Secondary “Clean” Bath: Uses high-purity () fresh solvent (IPA or TPM) to wash away the leftover residue.
Using automated wash stations (like the Form Wash L) controls agitation and prevents over-soaking.
[ Green Part from Printer ]
│
▼
┌───────────────────────┐
│ Primary “Dirty” Wash │ <── (Removes ~90% of bulk resin)
└───────────┬───────────┘
│
▼
┌───────────────────────┐
│ Secondary “Clean” Wash│ <── (Fresh solvent; removes film)
└───────────┬───────────┘
│
▼
┌───────────────────────┐
│ Thorough Air Dry │ <── (Mandatory; prevents cracks)
└───────────┬───────────┘
│
▼
┌───────────────────────┐
│ UV + Thermal Cure │ <── (Achieves final mechanicals)
└───────────────────────┘
You also need to make sure parts are perfectly dry before UV curing. If solvent sits on the part during UV exposure, you get micro-cracking, severe surface cloudiness, and weak spots. Air-dry parts on a rack for at least 30 to 60 minutes, or use clean compressed air.
Water Submersion for Oxygen Inhibition
If you print flexible or elastomeric resins (like Loctite IND475 or Formlabs Elastic), open-air curing leaves a sticky surface. This happens because atmospheric oxygen reacts with photogenerated radicals at the surface layer, which stops the polymerization chain reaction early.
Industrial operators submerge washed, dry elastomeric parts in a transparent, water-filled container (glass or acrylic) before placing them in the UV chamber. The water blocks the oxygen. For tough materials like IND475, I recommend adding a thin layer of mold release to the parts before you drop them in the water.
PPE and Shop Safety
Liquid resins cause skin irritation, contact dermatitis, chemical burns, and respiratory allergies. Solvents like IPA are highly flammable and produce harsh vapors. You need strict rules:
- PPE: Wear thick nitrile gloves (latex fails chemically), safety glasses to block flying resin chips, and organic vapor respirators.
- Ventilation: Use well-ventilated rooms or fume hoods.
- Disposal: Expose all contaminated waste (paper towels, gloves) to UV light to cure the liquid resin before you throw it away. Hand off saturated solvent to professional chemical waste services.
5. FAQ: Troubleshooting Top Post-Curing Problems
Here are the specific engineering answers to the five most common problems I see operators asking about online.
Q1: Can I over-cure my resin print if I leave it in the UV chamber too long?
Answer: Yes, but not in the way you might think. Extra time won’t increase cross-linking, but prolonged heat and UV exposure will cause severe photo-oxidative degradation.
The Explanation: Photopolymerization acts as an asymptotic curve. Under a standard light, polymerization maxes out within 15 to 30 minutes. More UV time does not mean more cross-linking. Instead, it attacks the polymer backbone. This causes yellowing and drops the part’s Elongation at Break (EAB), making it brittle. For instance, testing Ameralabs XVN-50 reveals that 1 hour of post-curing hits elongation at break. After 4 weeks in sunlight, it degrades to , while tensile strength creeps up slightly from to . You reduce this risk by increasing layer exposure times during printing (e.g., 6 seconds) to build a tougher green-state matrix.
Q2: Why do my cured prints still smell like toxic chemicals?
Answer: That smell comes from trapped volatile organic compounds (VOCs) and unreacted monomer vapors slowly bleeding out of the part.
The Explanation: Heated parts release VOCs inside the closed curing chamber. These vapors get stuck in the air and stick right back onto the part’s surface. Thick parts also create a conversion gradient: the outside cures fully, but the core stays under-cured, leaking unreacted monomers over time. You fix this by opening the curing chamber immediately after the cycle finishes. Then, let the parts sit in a well-ventilated space or fume hood for 24 to 96 hours to degas. Finally, apply primer or paint to seal the surface.
Q3: Why are my hollow prints cracking and leaking resin?
Answer: Without drainage holes, liquid resin and cleaning solvent get stuck inside, creating chemical damage and vapor pressure buildup that eventually breaks the print open.
The Explanation: This trapped liquid attacks the cured inner walls while VOCs create internal pressure. You prevent this by designing at least two opposing drainage holes (minimum diameter) into every hollow part to break the vacuum. Flush the inside actively with a syringe full of fresh IPA until it runs completely clear. Since UV light cannot pass through opaque walls, you must cure the inside using a fiber-optic UV probe or by submerging the part in water inside the chamber to bounce the light inside.
Q4: Will my resin prints melt or deform under high heat?
Answer: It depends entirely on the resin, but most standard materials begin softening around and will likely crack if rapidly heated to .
The Explanation: Most standard and engineering-grade photopolymers max out at after curing. If you hit too fast, the extreme thermal stress difference between the hot surface and the cold core cracks the part. Anything above causes chemical breakdown, toxic smoke, and burning. If you need high heat resistance, you must run a slow, multi-step thermal post-cure program (like Carbon’s EPX 82 schedule) to safely increase the heat deflection temperature.
Q5: When is the best time to remove support structures?
Answer: You should remove supports while the part is still in the “green state” before final UV curing, with very few exceptions.
The Explanation: The green state polymer network remains ductile, leaving the support contact points soft. This lets you snip the tips cleanly, avoiding surface divots or micro-fractures. Dipping the part in hot water for 1 to 2 minutes softens them even more for easy peeling. If you wait until after post-curing, the material becomes fully cross-linked and brittle. Snapping supports at that stage requires heavy force, which tears chunks out of the surface. The only time you keep supports on during the cure is when baking extremely thin, high-aspect-ratio geometries that would warp without a physical fixture holding them in place.
Wrapping Up
Nailing down exactly how long to cure resin prints requires understanding the specific material chemistry, following the data, and using controlled hardware. If you match the right temperature and UV wavelengths to your specific resin, you transform fragile green prints into functional, industrial-grade parts.
What curing setup are you running on your shop floor? Let me know in the comments if you are struggling with a specific resin profile.