


Release Date: 2026-04-10
Paul Li
CTO | Author18 years experience in the Research and Development of 3D printing equipment and additive manufacturing processes, empowering the efficient intelligent manufacturing of complex parts.
- Paul Li
- Model Acquisition and Optimization
- Slicing Software Configuration
- Comparison of Transparent Resin Types
- Recommended Material: High-Transparency Rigid Resin
- Pre-Printing Preparation
- Printing Parameter Details
- Printing Technique Sharing
- Initial Cleaning
- Support Removal and Polishing
- Ultraviolet Curing
- Transparency Enhancement Treatment
- Final Product Effect Evaluation
- Comparative Advantages Over Traditional Processes
Introduction: The Perfect Convergence of Technology and Art
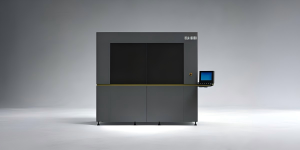
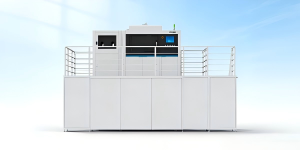
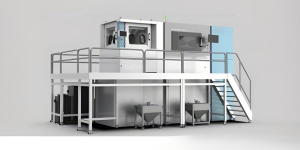
In today’s rapidly evolving 3D printing landscape, stereolithography (SLA) technology has emerged as the preferred choice for cultural and creative product manufacturing, thanks to its exceptional precision and refined surface quality. This article provides a detailed account of the complete process of using SLA technology to print a transparent Eiffel Tower model, from conceptual design to final presentation, comprehensively showcasing the infinite charm of this modern manufacturing technique.
Chapter 1: Design Phase – Precise Construction in the Digital World
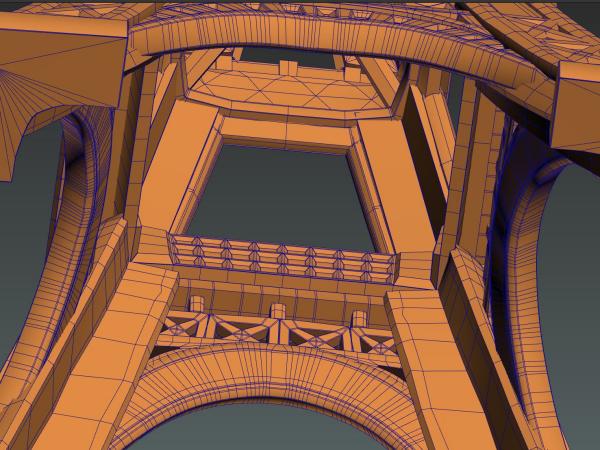
Model Acquisition and Optimization
Before beginning the printing process, we first need to obtain a high-quality 3D model of the Eiffel Tower. This model can be acquired through various channels, such as downloading ready-made models from professional 3D model websites, designing autonomously using 3D modeling software, or digitizing data obtained through 3D scanning technology of the actual tower.
After obtaining the model, we need to optimize it for printing. First, we must determine the appropriate scale based on the printer’s dimensions, typically recommending a tower height between ten to twenty centimeters, which ensures detail presentation while avoiding excessive printing difficulty due to large volume. Second, since the tower itself has numerous hollow structures, we need to add support columns at critical nodes to ensure model stability during printing. For transparent models, wall thickness control is particularly important, with a recommended thickness of one point five to two millimeters—too thin and it becomes fragile, too thick and it affects light transmission. Finally, we need to reserve connection points for printing supports at the model’s base to facilitate subsequent processing.
Slicing Software Configuration
Slicing software serves as the bridge between 3D models and printers, converting three-dimensional models into instructions that printers can understand. each with its own characteristics, allowing selection based on personal preference and device compatibility.
In slicing software, we need to set a series of key parameters. First is layer thickness—for high-precision transparent models, it’s recommended to set it to zero point zero five millimeters, ensuring a smoother surface on the printed model. Exposure time is another critical parameter—for transparent resin, exposure time needs to be appropriately extended, typically set to around two point five seconds per layer. Bottom layers and bottom exposure time also require special attention, generally set to eight bottom layers with fifteen seconds exposure per layer, ensuring good adhesion between the model and the printing platform.
When setting supports, a density of twenty-five to thirty percent is appropriate, with support contact point size set to zero point three to zero point four millimeters. For transparent models, anti-aliasing functionality should be enabled to reduce layer lines, gray scale parameters adjusted to eighty to ninety to enhance detail representation, and contour priority mode used to ensure outer surface smoothness.
Chapter 2: Material Selection – Scientific Matching of Transparent Resin
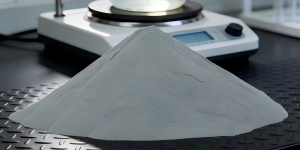
Comparison of Transparent Resin Types
There are various types of transparent resin available on the market, each with unique performance characteristics. High-transparency rigid resin can achieve a light transmittance of ninety-two percent, approaching glass-like texture, with higher hardness but relatively lower toughness, suitable for display models and decorative items. Tough transparent resin has slightly lower light transmittance at approximately eighty-eight percent, but better toughness, suitable for functional parts requiring certain external force resistance. Water-washable transparent resin has a light transmittance of ninety percent, with the significant advantage of being washable in water, making it more environmentally friendly and convenient. Heat-resistant transparent resin has a light transmittance of eighty-five percent and can withstand higher temperatures, suitable for high-temperature environment applications.
Recommended Material: High-Transparency Rigid Resin
For printing transparent Eiffel Tower display models like this, we recommend using high-transparency rigid resin. This resin achieves a light transmittance of up to ninety-two percent, presenting a glass-like texture. Its shrinkage rate is low, less than three percent, meaning printed models have good dimensional stability without deformation from shrinkage. After ultraviolet curing, hardness reaches eighty-five D, providing excellent wear and scratch resistance. Additionally, modern high-transparency rigid resins typically use low-odor formulations, making them more environmentally friendly and safe.
When preparing materials, we need to calculate the required resin amount based on model volume, typically adding a twenty percent loss coefficient to the theoretical amount. To ensure printing quality, it’s recommended to filter the resin using a one hundred mesh screen to remove impurities. During printing, resin temperature should be maintained between twenty-five to twenty-eight degrees Celsius, which is the optimal printing state for resin.
Chapter 3: Printing Process – Every Step of Precision Manufacturing
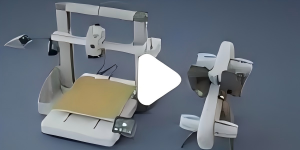
Pre-Printing Preparation
Before starting printing, we need to conduct a comprehensive equipment inspection. First, calibrate the printing platform’s levelness to ensure no layer misalignment occurs during printing. Then clean the resin tank to ensure no residual resin affects printing quality. It’s also necessary to test laser or light source intensity to ensure consistent exposure effects. Check the tank’s seal integrity to prevent resin leakage. The printing environment temperature should ideally be controlled between twenty to thirty degrees Celsius, avoiding excessively high or low temperatures that could affect printing results.
Safety protection is also an essential aspect. During operation, N95 masks and nitrile gloves should be worn to prevent inhalation of resin odors and skin contact. Safety goggles should be worn to protect eyes from ultraviolet radiation. The work area should maintain good ventilation, with isopropyl alcohol and paper towels prepared for emergency use.
Printing Parameter Details
For an Eiffel Tower model with a height of one hundred fifty millimeters, using a layer thickness of zero point zero five millimeters, a total of three thousand layers need to be printed. If each layer’s printing time is approximately eight seconds, the entire printing process will take about six point seven hours. This time may vary depending on model complexity and printer performance.
During the printing process, we need to monitor different stages. The first ten layers are critical—we need to focus on the adhesion between the first layer and the printing platform; if adhesion is poor, the entire print will fail. During the middle phase, regularly check resin levels to ensure adequate supply. The final fifty layers require careful observation of detail formation quality, as this is crucial for determining the model’s final appearance. If abnormalities such as layer misalignment occur during printing, immediately pause printing for handling.

Printing Technique Sharing
For transparent model printing, there are special techniques to enhance print quality. First, print orientation optimization is crucial—we recommend printing with the tower’s base facing downward, reducing visible support marks on critical surfaces. For large models, consider segmented printing—for example, dividing the base, body, and top into three separate parts for printing, which reduces printing difficulty and improves success rates. In slicing software, preview support distribution from multiple angles to ensure supports provide adequate support force without leaving obvious marks in critical positions. If conditions permit, use a camera for remote monitoring to observe printing progress at any time.
Chapter 4: Post-Processing Techniques – Transformation from Rough to Crystal Clear
Initial Cleaning
After printing is complete, the model surface will have uncured resin attached, requiring cleaning. First, carefully separate the model from the printing platform using a plastic spatula, avoiding metal tools to prevent surface scratches. Then immerse the model in ninety-nine percent isopropyl alcohol solution for five minutes, allowing uncured resin to dissolve. Next, use an ultrasonic cleaner for three minutes of cleaning at a frequency of forty kilohertz, thoroughly removing resin from model crevices. To ensure cleaning effectiveness, replace with fresh isopropyl alcohol for secondary cleaning, approximately three minutes. After cleaning, use lint-free paper to absorb surface liquid, then hang to dry for about ten minutes.
During the cleaning process, note that cleaning solution temperature should ideally be maintained between twenty to twenty-five degrees Celsius—excessively high temperatures will accelerate resin curing, affecting cleaning results. After cleaning, proceed immediately to the next step to prevent residual resin from gradually curing in air.
Support Removal and Polishing
The cleaned model still has support structures added during printing that need removal. Use diagonal pliers to cut supports along their base, leaving approximately zero point five millimeters of residue for subsequent polishing. For supports in complex areas, use tweezers for precise operation.
Polishing is a key step in enhancing model surface quality, requiring gradual progression from coarse to fine. First, use one hundred eighty grit sandpaper to remove obvious support marks, then sequentially use four hundred, eight hundred, one thousand two hundred, two thousand, and three thousand grit sandpaper for polishing. Each time sandpaper is changed, rinse the model surface with water to remove scratches from the previous grit. Polish in the same direction to avoid cross-hatching. For hard-to-reach edges and corners, use cotton swabs dipped in sandpaper for precise polishing.
Ultraviolet Curing
The polished model still requires ultraviolet curing to ensure complete resin curing and achieve optimal physical properties. Curing wavelength should be between three hundred sixty-five to four hundred five nanometers, with a duration of approximately thirty minutes, rotating the model during this time to ensure even light exposure on all surfaces. During curing, maintain a distance of ten to fifteen centimeters between the model and light source, with temperature controlled below forty degrees Celsius to avoid overheating and model deformation.
Professional ultraviolet curing chambers are the best choice, providing uniform illumination and stable temperature control. While sunlight exposure can also be used for curing, it requires two to three hours and is significantly affected by weather conditions, not recommended. Ultraviolet flashlights can be used for local touch-up lighting but are unsuitable for overall curing.
Transparency Enhancement Treatment
After the above processing, the model’s transparency has improved, but to achieve a crystal-clear effect, further polishing treatment is needed. Common polishing methods include sandpaper polishing, resin coating, hot air polishing, and chemical polishing. For complex Eiffel Tower models, we recommend the transparent resin coating method.
The specific operational steps are: first prepare transparent varnish, such as XTC-3D or transparent epoxy resin, stir thoroughly, then let stand for five minutes to allow bubbles to naturally dissipate. Then use a fine brush to apply a thin layer to the model surface, with thickness controlled between zero point one to zero point two millimeters. After application, hang the model to dry for twenty-four hours. Finally, inspect surface effects—if imperfections remain, secondary coating can be applied.
This coating method’s advantages include filling minor scratches to further enhance light transmittance, while increasing surface hardness and improving wear resistance. The coating also provides anti-ultraviolet aging protection, extending the model’s service life, and forms a protective film preventing fingerprint contamination.
Chapter 5: Final Product Display and Advantage Analysis
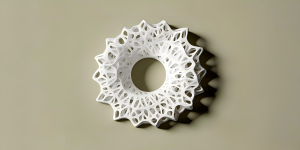
Final Product Effect Evaluation

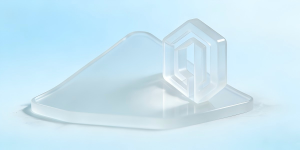
After completing the full printing and post-processing workflow, the final transparent Eiffel Tower model presents a stunning visual effect. After coating treatment, the model’s light transmittance can reach over ninety-five percent, with the surface presenting a mirror-like finish and reflectivity below five percent. At a one-to-one hundred scale, the tower’s beam textures remain clearly visible, with an overall texture resembling crystal carving—crystal clear and translucent.
From a dimensional accuracy perspective, SLA 3D printing achieves linear error less than zero point one percent, verticality error less than zero point zero five degrees, and critical node alignment accuracy reaching plus or minus zero point zero two millimeters. These figures fully demonstrate SLA technology’s high-precision characteristics.
Comparative Advantages Over Traditional Processes
Compared to traditional resin casting processes, SLA 3D printing has significant advantages in precision, achieving zero point zero five millimeter accuracy versus traditional processes’ typical zero point five millimeter capability. In handling complex structures, 3D printing faces virtually no limitations, while traditional processes are constrained by molds. In production cycle, 3D printing requires only eight to twelve hours, while traditional processes need three to five days. Although 3D printing’s per-unit cost is relatively higher, it has incomparable advantages in personalized customization.
Compared to laser-cut acrylic processes, 3D printing can achieve true three-dimensional structures, while laser cutting is primarily suitable for two-dimensional structures. Compared to metal etching processes, 3D printing has lower costs, shorter production cycles, and is more suitable for small-batch production.
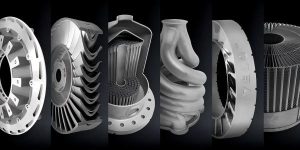
About Forgecise
Forgecise is an innovator in additive manufacturing technology, dedicated to providing high-performance metal 3D printing materials, equipment, and process solutions for the mold manufacturing, energy power, and other industrial sectors.