Author: Felix Lee, CEO at Forgecise (Additive Manufacturing Specialists)
Published: June 11, 2026
Table of Contents
Direct Answer (How long to cure resin prints?)
Post-curing times for vat polymerization resin prints range from 7 minutes for thin elastomeric parts cured in water to 3 hours of thermal post-baking for high-performance engineering resins. The exact curing duration is determined by three variables: resin chemistry (rigid, composite, biocompatible, or flexible), light irradiance (ranging from standard $20\ \text{mW/cm}^2$ benchtop units to $200\ \text{mW/cm}^2$ industrial chambers), and ambient chamber temperature (usually between $60\ ^\circ\text{C}$ and $170\ ^\circ\text{C}$). Standard ambient UV post-curing typically takes 20 to 60 minutes per side, but engineering-grade materials require synchronized thermal cycles to achieve full molecular stability.
1. Introduction: The Reality of the “Green State”
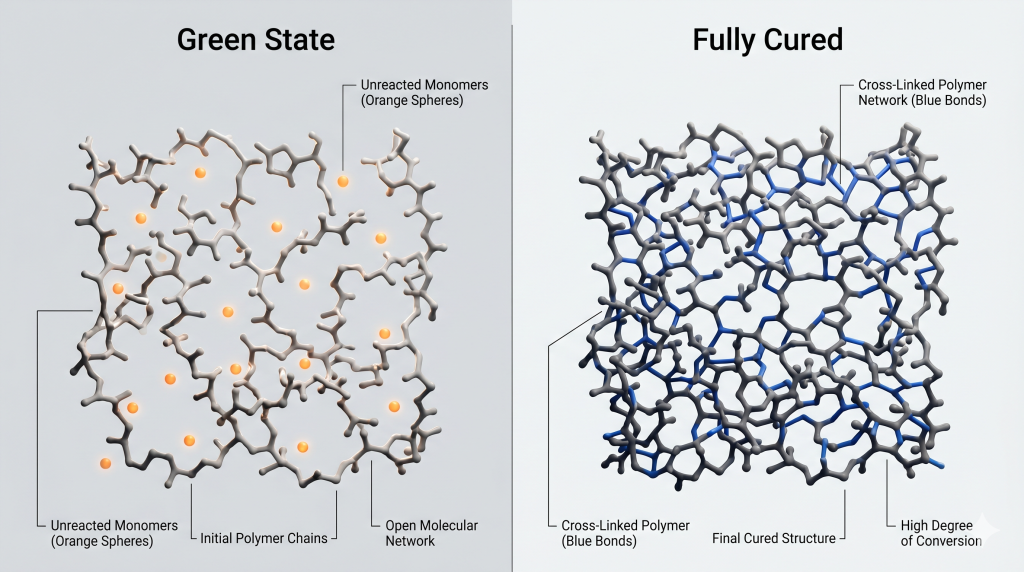
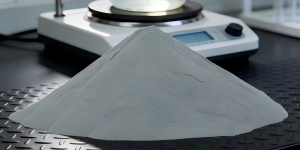
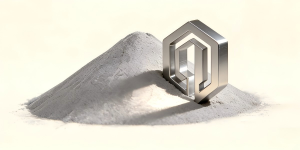
In industrial vat polymerization—which includes Stereolithography (SLA), Digital Light Processing (DLP), and Masked Stereolithography (MSLA)—the printing phase represents only a partial chemical transformation. Printed components emerge from the liquid photopolymer vat in a structurally sound but chemically incomplete state known as the “green state.”
[Printed Part in Green State] ──(UV Photons + Controlled Thermal Energy)──> [Fully Polymeric Matrix (Optimal Properties)]
Although these parts have achieved their final geometric shape, their polymerization reaction remains unfinished. Up to $30\%$ to $40\%$ of the reactive monomers and oligomers are left unreacted, trapped as liquid monomer pockets within the gelled polymer network.
To transform a green part into a functional component capable of withstanding industrial workloads, manufacturers must employ a standardized post-curing protocol. Post-curing is not a cosmetic finish; it is a critical chemical process required to unlock:
- Ultimate tensile strength ($\sigma_{\text{uts}}$)
- Flexural modulus ($E_f$)
- Heat Deflection Temperature (HDT)
- Biocompatibility compliance and long-term chemical stability
2. Chemical Kinetics: What Happens at the Molecular Level?
The primary physical objective of post-curing is to maximize the Degree of Conversion (DC%). The DC% represents the percentage of carbon-carbon double bonds ($\text{C}=\text{C}$) in the monomeric acrylic, methacrylic, or thiol-ene functional groups that have successfully reacted to form stable single carbon-carbon bonds ($\text{C}-\text{C}$) in the cross-linked polymer backbone.
The Kinetic Model of Photopolymerization
The progress of photopolymerization is governed by the concentration of available photoinitiators, the localized photon flux (irradiance, $I_e$, measured in $\text{mW/cm}^2$), and the ambient thermal energy of the system. The reaction rate can be modeled through the following radical polymerization rate equation:$$R_p = k_p [M] \left(\frac{\Phi I_a}{k_t}\right)^{1/2}$$
Where:
- $R_p$ is the polymerization rate.
- $k_p$ is the propagation rate constant.
- $[M]$ is the monomer concentration.
- $\Phi$ is the quantum yield of initiation.
- $I_a$ is the absorbed light intensity.
- $k_t$ is the termination rate constant.
The Vitrification Barrier
During the initial 3D printing phase, layer-by-layer light exposure rapidly transitions the resin through its gel point. This is the critical moment where a three-dimensional macromolecular network begins to form, restricting the macro-mobility of the polymer chains. As the reaction continues, the local glass transition temperature ($T_g$) of the green polymer network rises.
When the rising local $T_g$ reaches and exceeds the ambient printing temperature, the system undergoes vitrification (glass transition). In this glassy state, the diffusion of reactive species is blocked, and the polymerization rate ($R_p$) slows to a negligible crawl. This leaves a high density of unbonded reactive groups permanently frozen in place.
Polymerization Progress ──> Local Tg Rises ──> Tg > Ambient Temp ──> Vitrification (Reaction Freezes at ~60-70% DC)
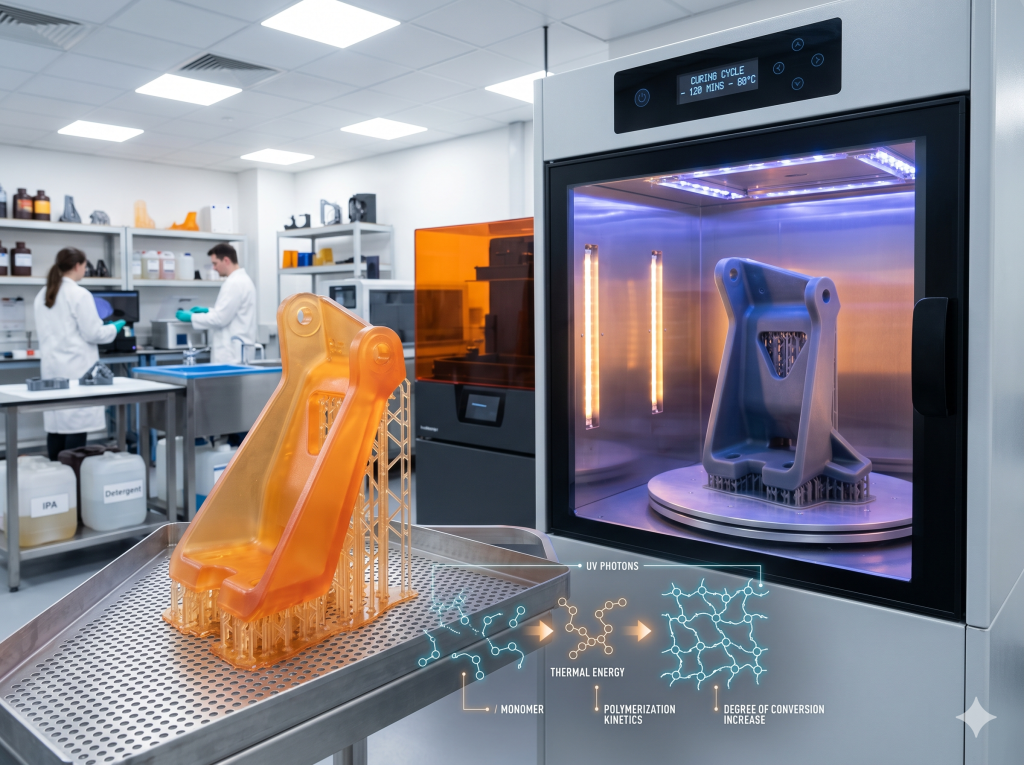
Post-curing overcomes the vitrification barrier by combining targeted ultraviolet (UV) radiation (typically at a wavelength of $385\ \text{nm}$ or $405\ \text{nm}$ to match the photoinitiator absorption spectra) with controlled thermal energy.
The introduction of heat increases the vibrational energy and mobility within the polymer network. This thermal activation allows the remaining reactive groups to overcome steric hindrance and undergo additional cross-linking. This combination of heat and light accelerates the degree of conversion, directly leading to an increase in density, tensile modulus, and chemical resistance.
3. Quantitative Comparison: Post-Curing Profiles and Mechanical Properties
The impact of post-curing parameters on the mechanical and thermal performance of engineering resins is highly material-specific. The table below compiles validated, standardized post-curing profiles and their corresponding effects on prominent B2B photopolymers:
| Resin Classification | Material Designation | Pre-Post-Curing Preparations | UV Exposure Specifications | Thermal Post-Bake Specifications | Resulting Mechanical & Thermal Performance |
| High-Stiffness Composite | Formlabs Rigid 4000 Resin | Thoroughly washed and dried | 15 min at $405\ \text{nm}$ | 15 min at $80\ ^\circ\text{C}$ (integrated chamber) | $116\%$ increase in modulus of elasticity; post-curing beyond 15 min causes cosmetic yellowing. |
| High Temperature | Loctite 3D IND147 BK | Ultrasonic wash in IPA for 2 min; dry 60 min at room temp | Wide-spectrum UV flood exposure | 3 hours at $170\ ^\circ\text{C}$ (non-food oven) | Ultimate Heat Deflection Temperature (HDT) of $230\ ^\circ\text{C}$ at $1.82\ \text{MPa}$. |
| Electrostatic Dissipative | Loctite 3D IND3380 BK | Wash in IPA for 2 min; dry 60 min; optional oven dry 45 min at $60\ ^\circ\text{C}$ | 30 min per side (CL36 LED at $80\ \text{mW/cm}^2$) | 3 hours at $170\ ^\circ\text{C}$ (ramp rate $\le 5\ ^\circ\text{C}/\text{min}$) | Achieves complete electrostatic dissipation; Flexural Modulus of $3200$–$3400\ \text{MPa}$. |
| Biocompatible Medical | Loctite 3D MED3394 BK | Wash in IPA for 2 min; dry 60 min at room temp | 10 min per side (CL36 LED at $80\ \text{mW/cm}^2$) | 1 hour at $100\ ^\circ\text{C}$ | High conversion rate to comply with ISO 10993 cytotoxicity and irritation requirements. |
| High Impact | Loctite 3D 3172 GY | Wash in IPA for 2.5 min; dry 60 min at room temp | 20 min per side (CL36 LED at $80\ \text{mW/cm}^2$) | N/A (Standard ambient curing) | Notched Izod Impact of $73 \pm 6\ \text{J/m}$; Shore D hardness of $57$–$63$. |
| Flame Retardant | Formlabs Flame Retardant | Thoroughly washed and dried | 10 min at $405\ \text{nm}$ | Pre-heat 5 min at $100\ ^\circ\text{C}$ (lights off); cure 10 min at $100\ ^\circ\text{C}$ | High heat deflection temperature (HDT of $94$–$111\ ^\circ\text{C}$ at $0.45\ \text{MPa}$); complies with UL94 vertical burn rating. |
| Elastomeric / Flexible | Formlabs Elastic 50A | Submerge dry part in room-temperature water beaker | 7 min at $405\ \text{nm}$ | 7 min at $70\ ^\circ\text{C}$ (integrated water-bath) | Eliminates surface tack via oxygen exclusion; maintains high elongation at break and tear strength. |
4. Operational Post-Processing Workflows and Validation Standards
Achieving repeatable mechanical properties requires strict adherence to a multi-stage post-processing workflow. Any deviation in washing, drying, or curing parameters will introduce mechanical defects and dimensional inaccuracies.
 1. Automated Wash ──> 2. Complete Drying ──> 3. Support Evaluation ──> 4. UV/Thermal Curing ──> 5. Quality Check
 (Dirty + Clean)        (Ambient/Convective)    (Pre vs. Post-Cure)      (Water/Nitrogen Bath)     (Vickers Hardness)
Step 1: Solvent Kinetics and Drying
The first step in SLA post-processing is removing the liquid resin film adhering to the printed surface. This is typically accomplished using high-purity ($\ge 95\%$) Isopropyl Alcohol (IPA) or a non-flammable alternative like Tripropylene Glycol Monomethyl Ether (TPM) in automated, agitated wash stations.
B2B manufacturing lines implement a two-stage wash sequence:
- A “dirty” wash to dissolve the bulk of the raw resin.
- A “clean” wash in uncontaminated, fresh solvent to remove any remaining oily film.
If a component is submerged in solvent for too long, the liquid resin-solvent mixture will penetrate the outer skin of the green print, causing swelling, micro-cracking, and a permanent reduction in tensile strength. Extreme exposure to IPA (e.g., leaving a part submerged for 1–2 days) causes severe chemical degradation, making the resin crumbly and easily crushed under finger pressure.
Following washing, parts must be completely dried. Solvent trapped inside the micro-pores of the polymer network behaves as a localized plasticizer, interfering with subsequent photopolymerization and causing severe structural weakness. Industrial protocols require a minimum 60-minute ambient wait time or a low-temperature convective drying step before exposing parts to UV post-curing.
Step 2: Overcoming Oxygen Inhibition and Surface Curing
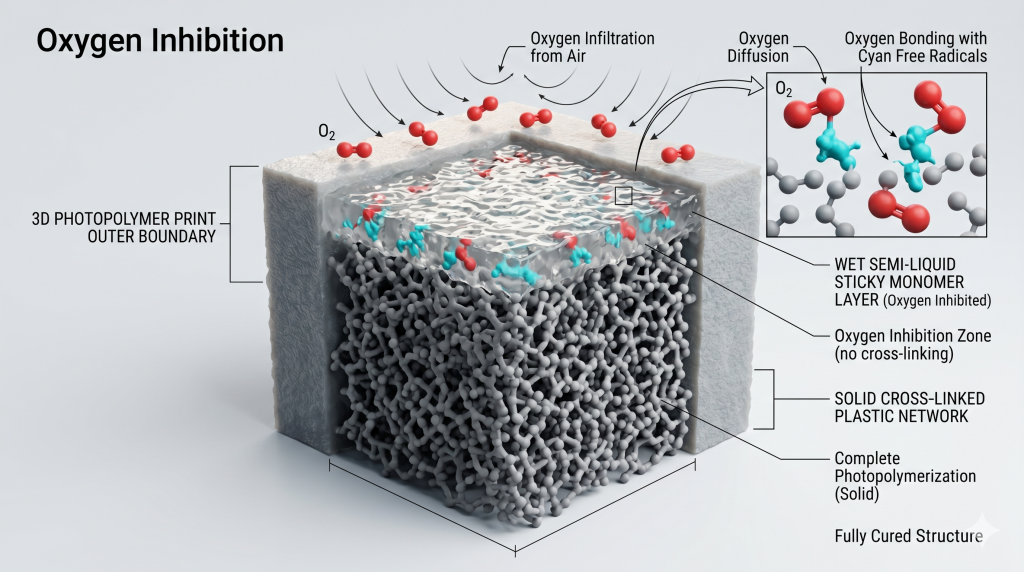
A major hurdle in photopolymerization is oxygen inhibition. Ambient oxygen ($\text{O}_2$) acts as an efficient radical scavenger, reacting with carbon-centered radical active species at the liquid-air interface to form stable, non-reactive peroxy radicals:$$\text{R}^\bullet + \text{O}_2 \longrightarrow \text{R-O-O}^\bullet \quad (\text{Stable, Non-Reactive Peroxy Radical})$$
This reaction prevents full polymerization at the outer boundary, leaving a tacky, under-cured surface layer.
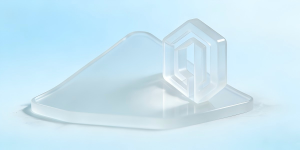
To eliminate this tacky layer and ensure full surface conversion, B2B workflows utilize specialized techniques. Curing components submerged in a water bath (water-curing) or under a pressurized nitrogen ($\text{N}_2$) gas blanket successfully blocks oxygen contact. This allows for rapid, tack-free surface conversion and can reduce required UV exposure times by up to $50\%$.
Step 3: Support Management and Dimensional Integrity
The timing of support structure removal represents a critical trade-off between cosmetic finish and dimensional accuracy:
- Pre-Cure Support Removal: In the green state, the resin has a lower modulus and is highly pliable. Soaking the component in warm water at approximately $50\ ^\circ\text{C}$ further softens the supports, enabling them to be peeled away cleanly. This minimizes support scars, pitting, and structural micro-cracks on the model surface.
- Post-Cure Support Removal: For mechanical parts with tight tolerances and thin-walled features, the support scaffold acts as an essential physical constraint. Curing the component with the supports intact prevents the asymmetric shrinkage and thermal warping that often occurs as the polymer network densifies and undergoes thermal expansion during UV-heat exposure.
Step 4: Hollow Models and Venting Controls

To optimize material consumption and control exothermic build-up during printing, large components are frequently hollowed out. However, hollow designs introduce significant chemical and structural hazards if not handled properly.
Trapped liquid resin inside a sealed cavity will chemically degrade the cured shell over time. The uncured material slowly decomposes the cross-linked polymer network, generating internal pressure and outgassing. This process leads to stress-cracking, leaking of toxic uncured resin, or catastrophic rupture of the part weeks or months after production.
To prevent this, the CAD design must incorporate at least two strategically placed escape holes with a minimum diameter of $10\ \text{mm}$. This layout creates a continuous fluid path, allowing operators to flush the internal void with solvent until the effluent runs completely clean.
Once the cavity is dry, the interior walls must be actively cured. This is accomplished by:
- Snaking a flexible fiber-optic UV probe or a miniature UV LED array directly into the drain holes.
- Submerging the print in a water bath under high-intensity UV exposure. The high refractive index of water ($n \approx 1.33$) refracts and scatters the UV light through the drain holes, ensuring the light reaches and cures the internal cavity surfaces.
5. Real-World B2B Case Studies and Professional Insights
Real-world experience from industrial dental labs, manufacturing circles, and specialized post-processing forums provides valuable insights into the behavior of photopolymers:
Case Study A: Evaporation of Volatiles and the 48-Hour Strength Peak
Industrial operators frequently report that components exhibit high flexibility immediately after printing and post-curing, which then decreases over the following 24 to 48 hours. This phenomenon is driven by the evaporation of residual volatile compounds within the resin.
While under-curing preserves temporary flexibility, it ultimately reduces the long-term tensile strength of the part. Synchronized thermal curing helps drive out these volatile compounds in a controlled manner, yielding a more stable, higher-strength polymer matrix.
Case Study B: Industrial Resin Blending to Mitigate Brittleness
In standard B2B production lines where specialized engineering resins are cost-prohibitive, operators often blend tough or flexible resins into standard or ABS-like resins. A common mixture used to reduce the brittleness of standard resins consists of mixing Siraya Tech Tenacious or Elegoo Tough into standard resin at ratios between 1:5 and 2:8. This approach improves the impact resistance of the cured part without requiring specialized, high-temperature post-curing cycles.
Case Study C: The Machine-Dependent Nature of Curing Units
On-the-ground experience emphasizes that curing parameters are highly machine-dependent. For example, a high-power curing unit with an irradiance of $200\ \text{mW/cm}^2$ can cure a Loctite engineering resin in 10 minutes, whereas a standard benchtop chamber with only $20\ \text{mW/cm}^2$ irradiance requires 100 minutes to achieve the same degree of conversion. This highlights the need for B2B operators to calibrate curing times based on the specific irradiance and wavelength of their hardware.
6. Industrial Quality Control, Compliance, and Standardization
For B2B organizations, implementing photopolymer additive manufacturing at scale requires strict adherence to international material testing standards and quality control protocols.
Standardization Frameworks
Manufacturers must align their testing and validation protocols with recognized standards to ensure consistent, reliable part performance:
- Mechanical Testing (ASTM D638 & ASTM D790): Material properties must be evaluated using standard specimens. Tensile properties, including Young’s modulus and elongation at break, are measured using ASTM D638 Type IV specimen geometries. Flexural strength and modulus are determined using three-point bending tests according to ASTM D790.
- Thermal Characterization (ASTM D648): The Heat Deflection Temperature (HDT) must be verified under standard loads (typically $0.455\ \text{MPa}$ or $1.82\ \text{MPa}$) following ASTM D648 to confirm the material can withstand target operational temperatures.
- Biocompatibility (ISO 10993 & ISO 20795): For medical and dental devices, components must comply with ISO 10993 testing, which includes ISO 10993-5 (cytotoxicity) and ISO 10993-10 (sensitization) evaluations. Denture base materials must also satisfy the requirements of ISO 20795-1.
Process Repeatability and Equipment Validation
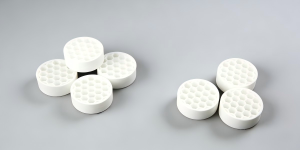
Research demonstrates that the choice of post-curing equipment can have a greater impact on the final properties of a print than the choice of the 3D printer itself.
Comparative studies have shown that using different curing units on the same resin can result in significant variations in the Degree of Conversion:$$\text{DC\% High-Power Unit (79.7\%)} \longleftrightarrow \text{DC\% Standard Unit (73.2\%)} \Longrightarrow \text{Compressive Strength: } 181.55\ \text{MPa} \text{ vs. } 151.54\ \text{MPa}$$
This variation directly impacts performance, leading to substantial differences in compressive strength (e.g., $181.55\ \text{MPa}$ vs. $151.54\ \text{MPa}$).
Quantitative material testing has also demonstrated a strong positive correlation ($r = 0.796$) between the Degree of Conversion (DC%) and Vickers Microhardness (VHN), alongside a strong negative correlation ($r = -0.763$) between DC% and staining susceptibility ($\Delta E_{00}$):
       [Degree of Conversion (DC%)]
             /                  \
            /                    \
   (r = +0.796)                (r = -0.763)
          /                        \
         v                          v
 [Vickers Hardness (VHN)]    [Staining Susceptibility (ΔE)]
These relationships indicate that incomplete post-curing not only compromises structural integrity but also accelerates physical degradation, moisture absorption, and cosmetic staining over time.
To establish a reliable production workflow, B2B organizations must avoid unvalidated or DIY curing setups. Instead, they should utilize curing chambers equipped with closed-loop thermal controls, calibrated UV light sources, and rotating turntables to ensure consistent, even exposure.
7. FAQs: Crucial Forum Questions Answered with Authoritative Data
Q1: Is “overcuring” a chemically valid phenomenon, and how does extended UV exposure affect the mechanical performance of engineering photopolymers?
Direct Answer: Overcuring is chemically impossible beyond a $100\%$ conversion rate, but extended UV exposure causes photo-oxidative degradation that makes parts brittle and yellow.
Once all available photoinitiators and reactive functional groups have formed covalent bonds, further exposure to UV light does not increase density or cross-link density.
However, “overcuring” is a valid term when referring to photo-oxidative degradation. Extended UV exposure in the presence of oxygen initiates photolysis, which cleaves the primary polymer chains. This degradation results in a loss of impact strength, a reduction in elongation at break, and significant cosmetic yellowing.
Furthermore, rapid and intense surface-only curing can create a high-density outer skin over an under-cured core. The resulting differential shrinkage establishes high internal stress gradients, making the component prone to premature mechanical failure under load. Manufacturers must strictly adhere to the exposure times and temperatures validated in the material’s Technical Data Sheet (TDS).
Q2: What are the mechanical and chemical risks associated with hollowed resin prints, and what are the validated industrial steps to prevent post-build cracking?
Direct Answer: Trapped liquid resin inside hollowed prints slowly decomposes the outer shell, causing stress-cracking, outgassing, and leaks; you must use at least two $10\ \text{mm}$ drain holes, flush the core with solvent, dry it, and actively cure the interior.
Liquid resin trapped within an unvented cavity remains chemically active. Over time, this trapped liquid undergoes slow, localized polymerization when exposed to ambient light, generating heat and gas.
Because photopolymers shrink as they cross-link, the internal liquid reacts with and exerts stress on the cured outer shell. This process leads to stress-cracking, dimensional distortion, outgassing, and eventual leaking of toxic liquid resin.
To eliminate these risks, B2B workflows must implement the following validated steps:
- Venting and Drain Holes: Incorporate at least two strategically placed escape holes with a minimum diameter of $10\ \text{mm}$ to ensure complete liquid escape.
- Solvent Flushing: Thoroughly flush the internal cavity with fresh IPA using a syringe or pressure pump until the effluent runs completely clear.
- Drying: Ensure complete internal drying of the part before curing using compressed air.
- Internal Curing: Insert flexible fiber-optic UV LED probes directly into the vent holes, or submerge the part in water during UV exposure to leverage water’s refractive properties ($n \approx 1.33$) and scatter light into the internal cavity.
Q3: How should manufacturers decide between pre-cure and post-cure support removal to balance throughput, surface finish, and dimensional trueness?
Direct Answer: Remove supports pre-cure (using warm $50\ ^\circ\text{C}$ water) for a smooth cosmetic finish on detailed parts, but leave them on during the post-cure cycle to prevent warping on high-tolerance mechanical components.
The decision between pre-cure and post-cure support removal depends on the geometric complexity and dimensional tolerance requirements of the component:
- Pre-Cure Support Removal (Best Surface Finish): Softening the supports in a warm water bath ($\sim 50\ ^\circ\text{C}$) before curing allows them to be peeled away cleanly in the green state. This minimizes surface pitting and post-sanding labor, making it ideal for highly detailed, biocompatible, or aesthetic parts.
- Post-Cure Support Removal (Best Dimensional Accuracy): For mechanical parts with tight tolerances and thin-walled features, the support scaffold acts as an essential physical constraint. Curing the component with supports intact prevents the asymmetric shrinkage and thermal warping that can occur as the polymer network densifies and undergoes thermal expansion during UV-heat exposure.
Q4: Why does high-performance resin engineering require synchronized UV and thermal post-curing cycles instead of UV exposure alone?
Direct Answer: UV light alone causes the resin to vitrify (freeze the reaction) before reaching optimal properties; adding heat keeps the polymer chains mobile, enabling the reaction to achieve a high degree of conversion.
For engineering-grade resins (such as high-temperature, glass-filled, or tough formulations), UV light alone is insufficient to reach optimal mechanical properties. As UV radiation initiates cross-linking at room temperature, the polymer’s glass transition temperature ($T_g$) rises. Once the local $T_g$ exceeds the ambient curing temperature, the polymer vitrifies, locking the remaining unreacted groups in place and stopping the reaction.
Integrating heat (typically $60\ ^\circ\text{C}$ to $100\ ^\circ\text{C}$, and up to $170\ ^\circ\text{C}$ for advanced resins) provides the necessary thermal energy to sustain molecular mobility. This allows the curing cycle to achieve a significantly higher degree of conversion (DC%). This synergistic approach is essential to maximize the material’s flexural modulus, impact resistance, and heat deflection temperature (HDT).
Q5: How do post-curing parameter variations impact biocompatibility compliance (e.g., ISO 10993) in medical and dental manufacturing?
Direct Answer: Slightly under-curing biocompatible resin leaves toxic, unreacted monomers that leach out and cause tissue irritation or cytotoxicity failures; you must maximize the degree of conversion using validated hardware parameters.
In medical, dental, and skin-contact applications, post-curing is a critical regulatory step rather than an optional enhancement. Liquid photopolymers contain residual monomers, reactive oligomers, and photoinitiators that are cytotoxic and can cause tissue irritation or sensitization upon contact.
Biocompatibility compliance under standards such as ISO 10993-5 (cytotoxicity) and ISO 10993-10 (sensitization) requires maximizing the Degree of Conversion (DC%) to minimize these residual leachable components. Any deviation from the manufacturer’s validated post-processing instructions—such as using lower temperatures, shorter cure times, or mismatched UV wavelengths—can leave unsafe levels of unreacted monomers. This leads to biocompatibility failure, regulatory non-compliance, and clinical risks.
8. Summary Checklist: Actionable Quality Control Protocol for B2B Print Operations
To ensure consistent quality, reduce part rejection rates, and maintain regulatory compliance, B2B manufacturing operations should implement the following five-point protocol:
- Establish a Two-Stage Solvent Washing Line: Implement a “dirty” wash to dissolve the bulk of the raw resin, followed by a “clean” wash in uncontaminated solvent. Monitor solvent saturation levels using hydrometers or densitometers to ensure effective cleaning and prevent raw resin from re-depositing onto part surfaces.
- Implement Mandatory Drying Windows: Require washed parts to dry completely before post-curing. Implement a documented wait time (e.g., a minimum of 60 minutes) or utilize low-temperature convective drying ovens to ensure all residual solvent has evaporated from the polymer matrix.
- Use Dual-Stage UV-Thermal Curing for Performance Parts: For structural, high-temperature, or medical-grade components, implement synchronized UV and thermal post-curing cycles. Gradual thermal ramping and controlled cooling cycles (ramp rate $\le 5\ ^\circ\text{C}/\text{min}$) should be used to minimize internal stress and prevent warping.
- Standardize Venting and Curing of Hollow Designs: Require at least two escape holes of $\ge 10\ \text{mm}$ diameter for all hollowed geometries. Ensure internal cavities are thoroughly flushed, dried, and actively cured using internal UV light sources or water-submersion techniques.
- Validate Equipment and Standardize Curing Recipes: Standardize post-processing workflows by using validated curing units that provide precise wavelength, temperature, and exposure control. Lock in calibrated recipes for each resin family and perform regular testing (such as Vickers Microhardness testing) to ensure consistent mechanical and thermal properties across production runs.